I'm a Little Teapot
My mom is an artist, and I grew up so deeply immersed in art that it almost felt like drowning – submerged in gallery openings, endless museums, sitting for portraits, the ever present scent of gesso and turpentine. By the time I left home I was burnt out on the abstract, the metaphorical, and the allegorical. I was thoroughly jaded – why waste time on such things when there were “real” problems to solve?
Decades later those long dormant seeds of artistic appreciation started to sprout. Now I love impressionism, pointillism, screen printing, linocut, and other creative ways of constructing beautiful and recognizable images. My walls are covered with my mom’s art, and I love how she shares her view of the world.
Loving art and being profoundly nerdy is a great combination. While I haven’t spent my life practicing oil painting or sculpture, I have been working in code for years, and I was once an aspiring photographer. Last year I started working on a project to combine the two to generate abstract and impressionistic images.
Over the course of the project I’ve fallen in love with dots.
Dots?
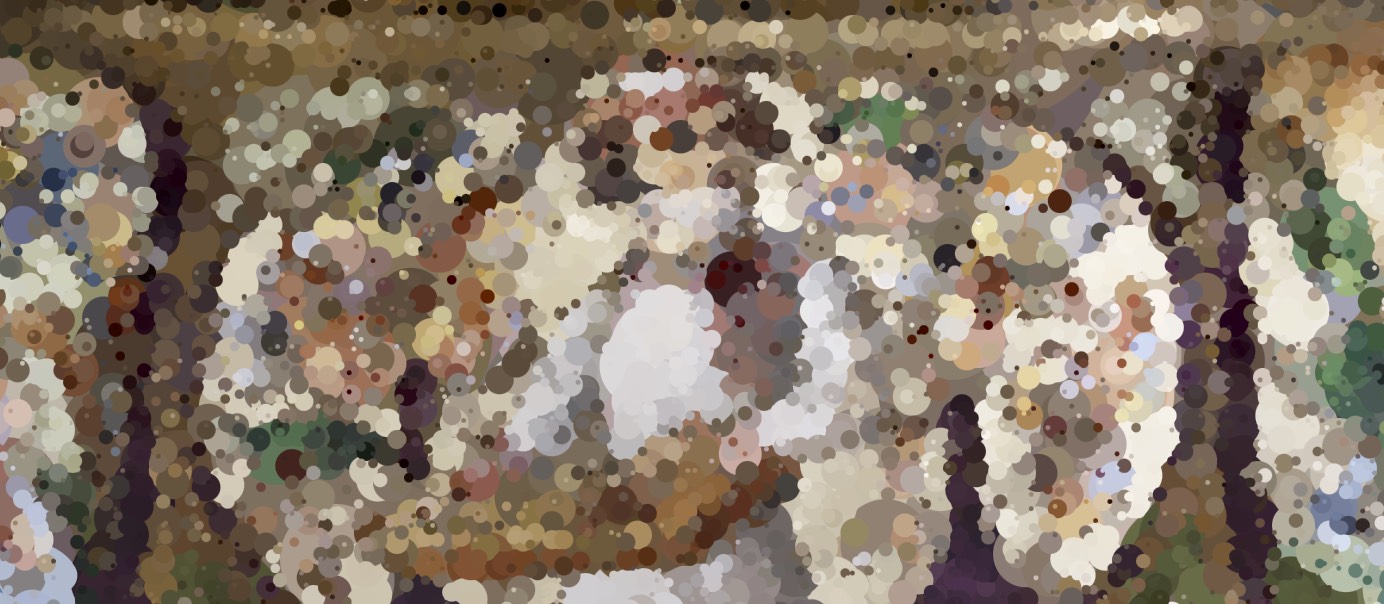
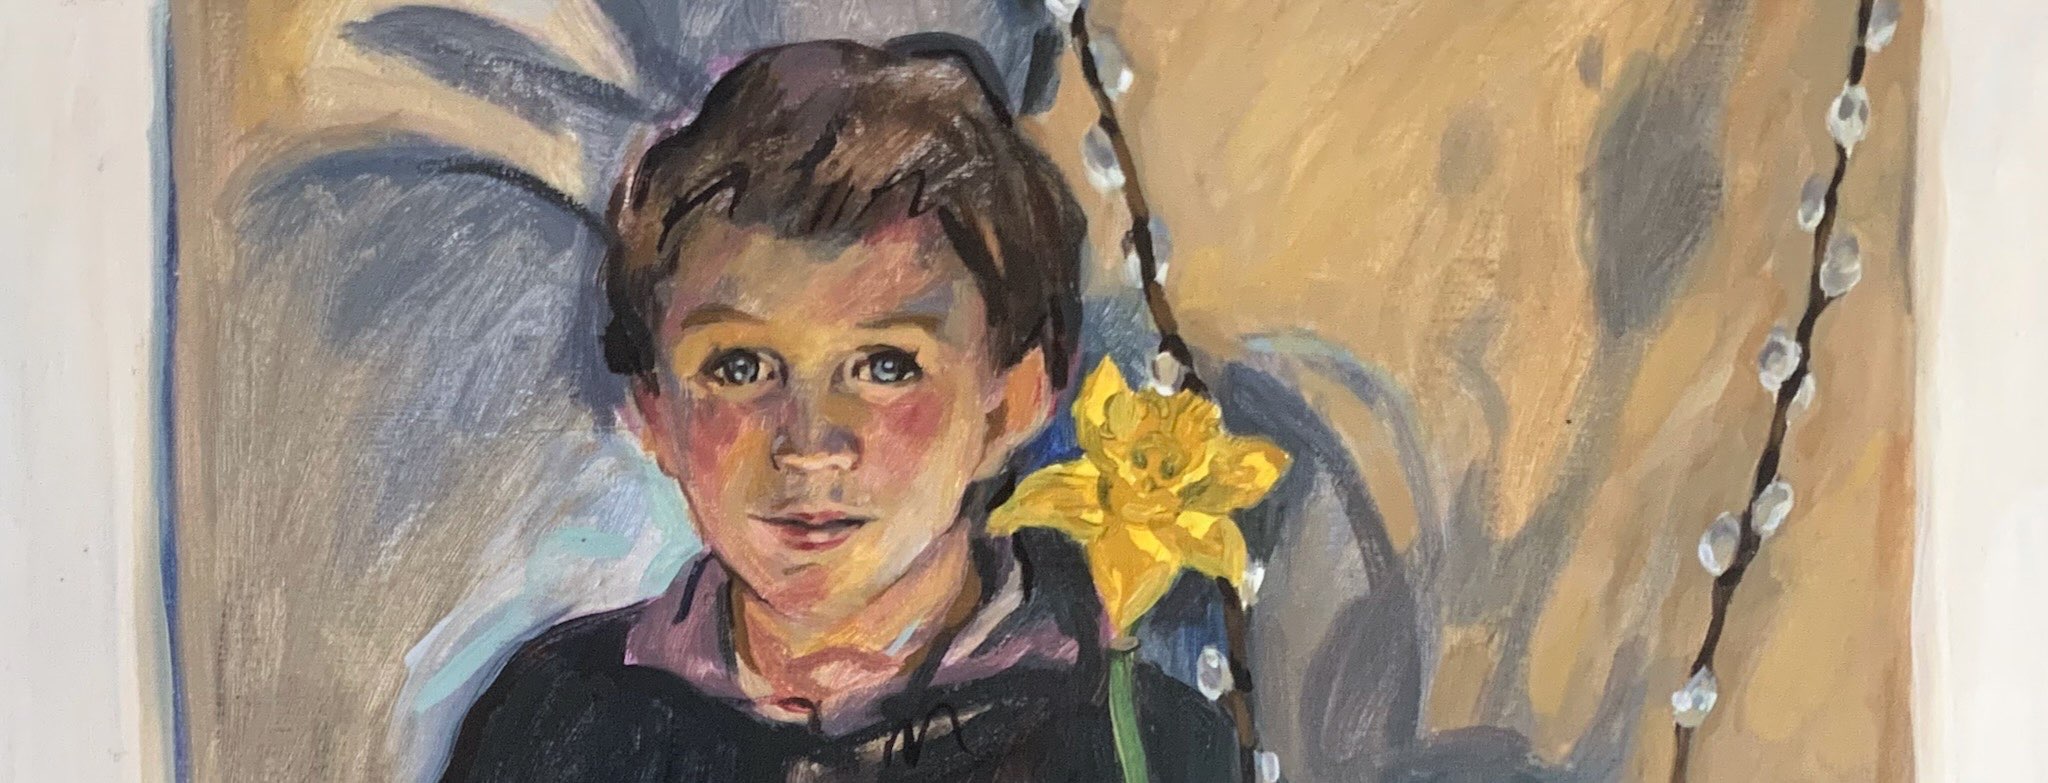
Zoom in on this image and you’ll see what I mean.
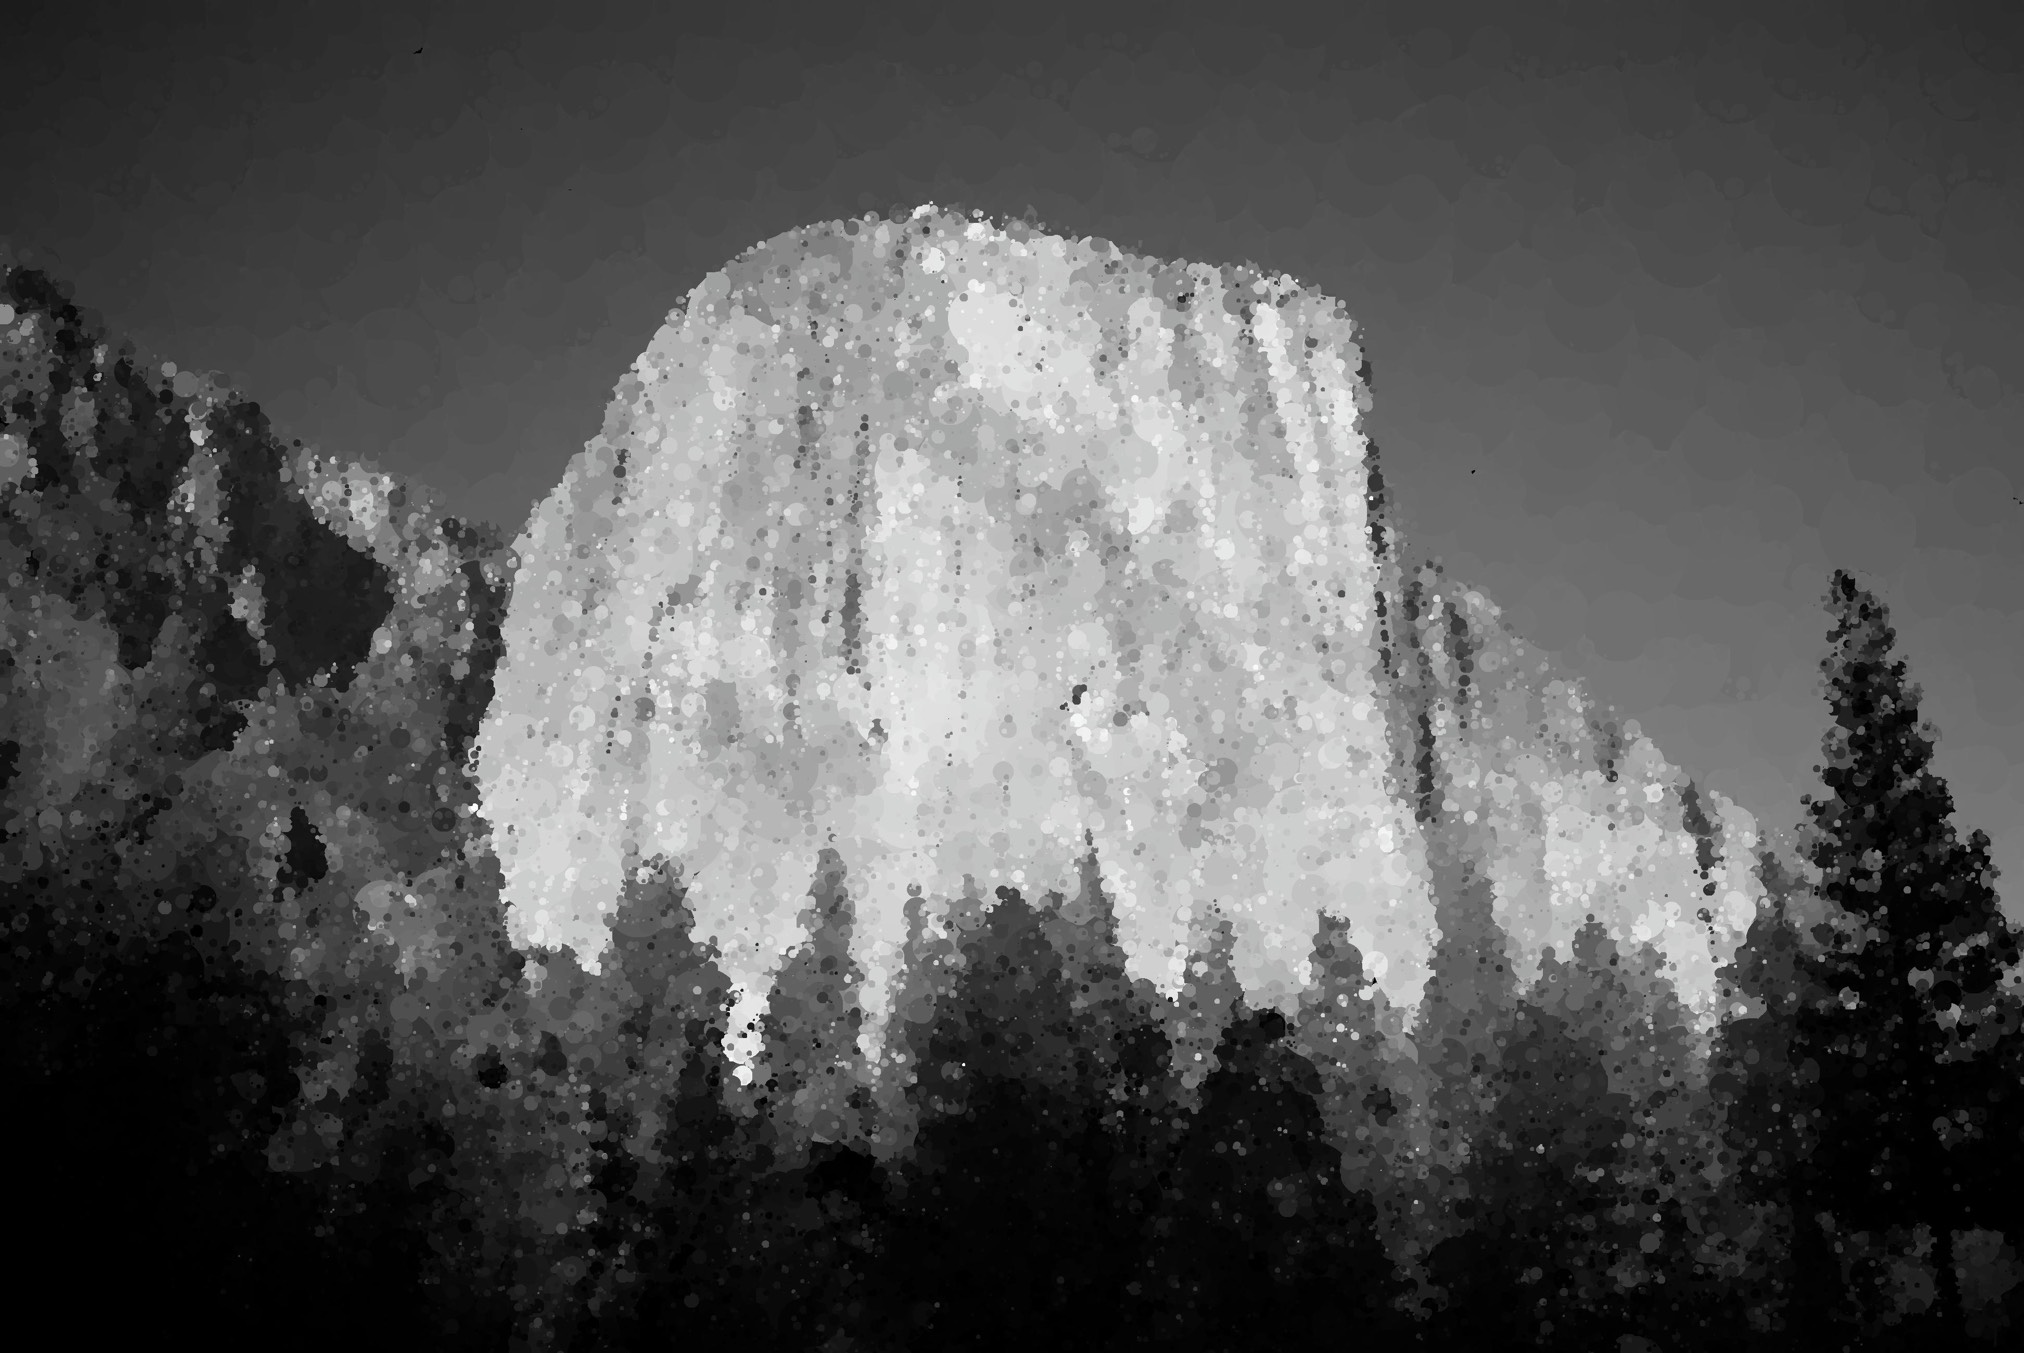
I love this effect. It’s pointillism meets Kusama meets watercolor. With black and white photos it creates a rainy, somber look.
What the heck does all of this have to do with teapots?
It’s my nod to the Utah Teapot, a reference model used for over 40 years in 3D rendering and computer graphics. I also love tea, so finding a fancy teapot as the reference for my dot rendering software seemed like a natural fit.
After some Googling, I found this gorgeous bit of porcelain …

(Tangent: props to The Walters Museum for using Creative Commons licenses for their images. They did a great job photographing their collection, and putting those images under Creative Commons means people like you and I are free to use, remix, and otherwise reinterpret them to our own creative ends. To those ends, all of my original content here is also released under a Creative Commons license. Click the link in the footer to learn more.)
I chose this image for a few reasons – it has smooth gradients, sharp lines, and colorful patterns. The original is also fairly high resolution with plenty of detail to work with.
I went into this with a very basic idea: how can I recreate an image using simple shapes? I wasn’t aiming for stacked dots, but that’s where this experiment ended up, and I love it.
I’m a little sad I didn’t keep the “work in progress” images while I was working through the discovery process. It took several days of trying different ideas, and hundreds of failures and dead-end ideas that didn’t pan out.
After a rather winding route, here’s my interpretation of the Globular Teapot, built with 45,000 dots.
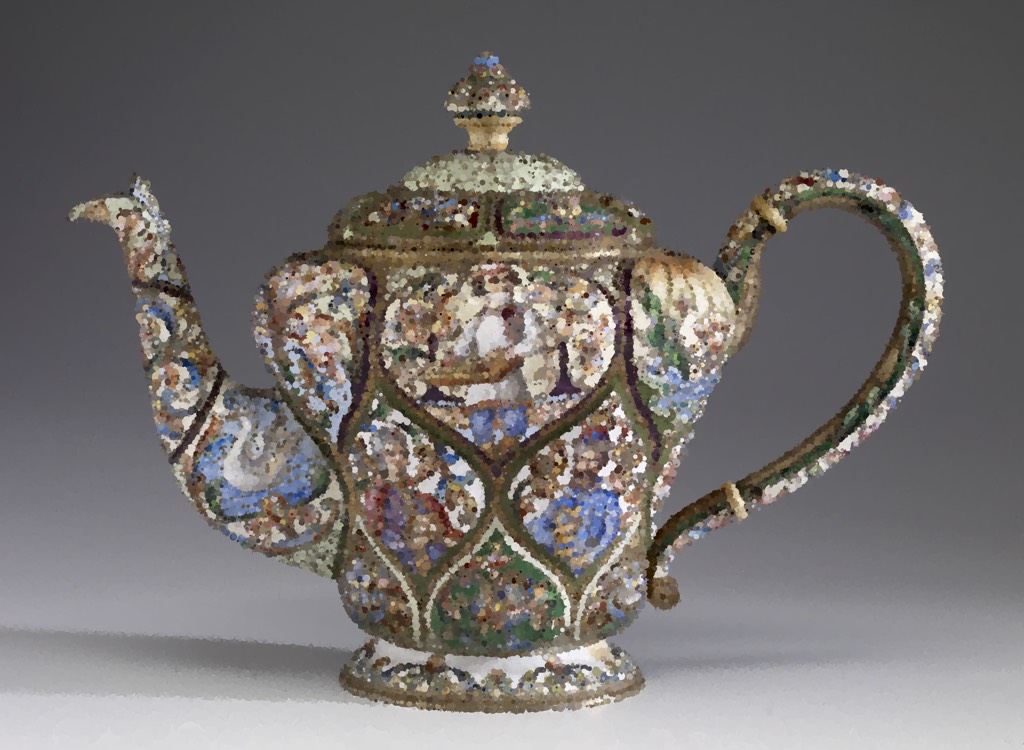
At first glance it just looks like a blurry version of the original. The joy of this process is when you zoom in! The output is extremely scalable and the deeper you go, the more detail you find with layers and layers of colorful dots.
The ultimate level of detail is constrained by the resolution of the original image of course; it can’t invent details that aren’t there. Still, the abstract nature of the output lends itself to scaling far beyond the point where the original image would be a chunky blur of colored pixels.
How does it work?
The algorithm for building these images is pretty simple:
- Sample a random pixel in the source image.
- Draw a big dot in the output image, centered at the same location and color as the sample pixel.
- Compare that region of the output image to the source image, and if the output image is more similar than the previous version, keep it.
- Repeat using ever shrinking dots to build up layers of texture and detail.
Of course, the devil is in the details. Image similarity is fraught, and doing all of the above millions of times to generate a final image with 50,000 circles is very inefficient.
Here’s a 15 second video showing how the algorithm starts with big dots then works its way down to tiny dots. At about three seconds in you start seeing splotches of color, at six seconds the overall shape becomes apparent, and at ten seconds the details start to emerge.
Where’s the code?
The Rust source is on GitHub at https://github.com/peat/sediment. It’s a work in progress; I haven’t been able to put in significant time in a few months, and there are a lot of big sample images and renderings included in the repo.
Messiness aside, it has several different modes of operation –
First is build mode, which takes a configuration and a source image and generates a data file containing the position, size, and color of the generated dots. There’s a cross platform GUI (using the excellent egui crate) that shows rendering progress and stats.
The second mode is render, which supports two different outputs: SVG as the vector format, and PNG as the rasterized format.
Someday I’ll get around to writing a more compact representation and a javascript class for drawing and navigating (zooming, panning) through the images. Beyond that … creating a WASM target that can build and render just in the browser?
Hit me up on social media if you have questions, thoughts, or contributions. I’d love to hear from ya!